


高性能なシステム、ゲームエンジン、またはZigで低レベルの組み込みソフトウェアを開発する際、コンパイル時ジェネリクス、タグ付きユニオン、明示的なメモリ管理モデルを扱うことで、全体のシステムアーキテクチャを可視化するのが難しくなることがあります。Zig VisualizerはZigのstruct、タグ付きユニオン(union(enum))、エラーセット、関数ポインタを明確でインタラクティブなアーキテクチャ図に変換します。データ構造、メンバー型、明示的なアロケータのリンク、メソッド契約を解析することで、システムプログラマーおよびファームウェアエンジニアは、低レベルのZigコード構造を一目で視覚的に確認できます。
Zigビジュアライゼーションのメカニズム
VPasCodeでは、Zigレンダリングが自動的にstruct宣言、union(enum)タグ付きブロック、errorエラーセット、および関数定義を構造化された視覚的図カードに変換します。structは主なエンティティブロックとしてレンダリングされ、ポインタ/スライスフィールドはメモリ境界を表示し、関数ポインタまたはコンパイル時インターフェース宣言は視覚的ノード間の明確な構造的関係線を生成します。
1. 必須のセットアップ
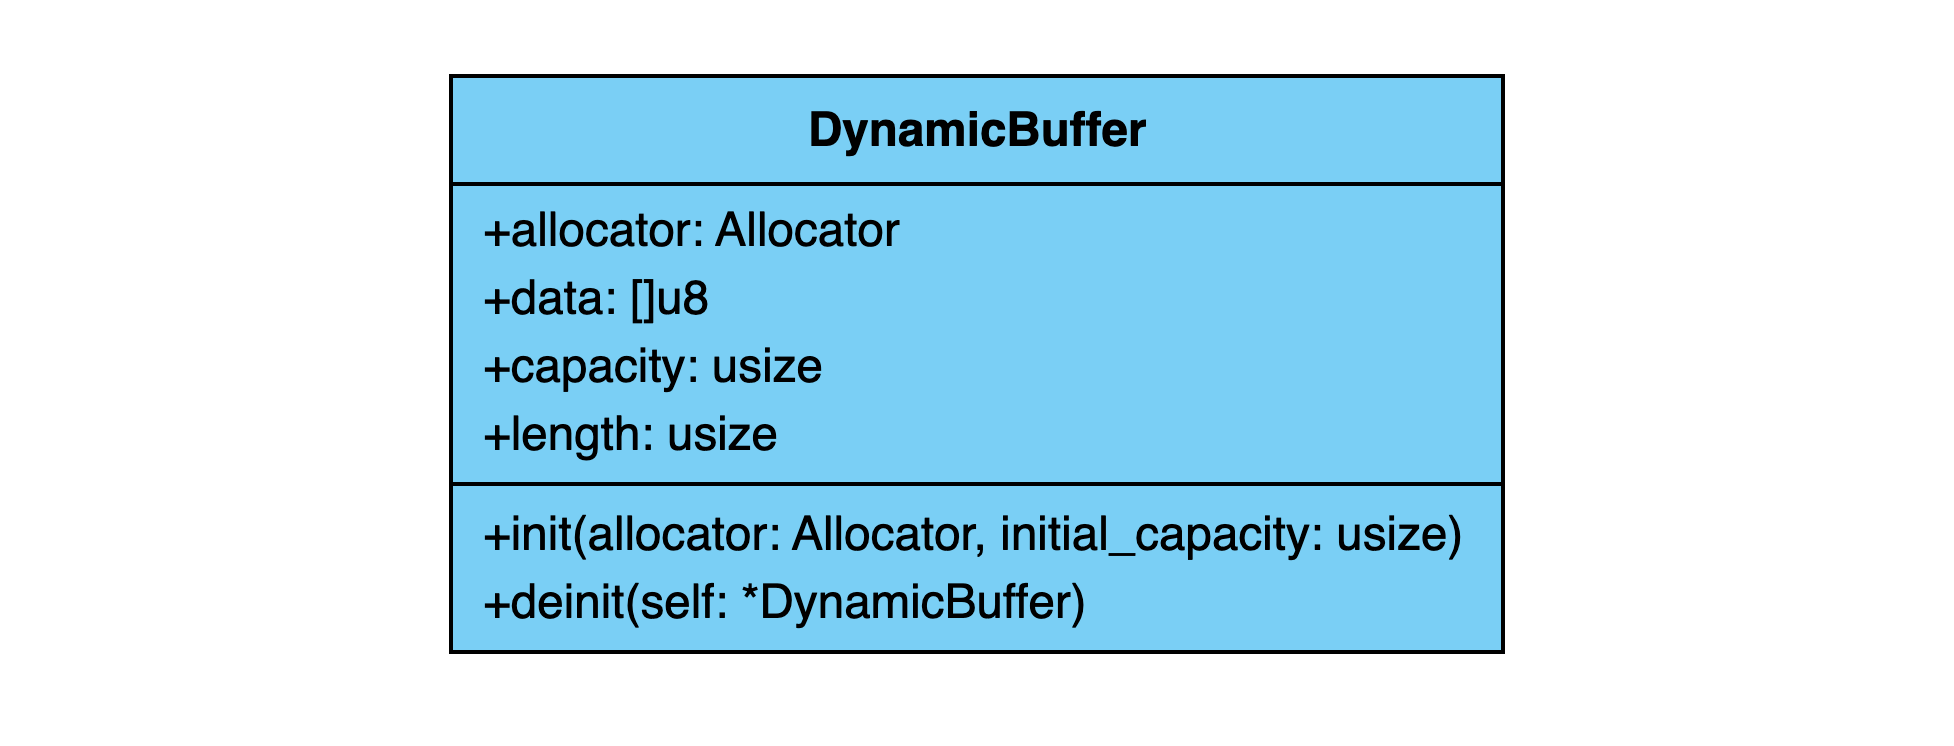
標準的なZigモジュールを可視化するには、struct、エラーセット、明示的なメモリ割り当て境界を定義します。メモリ管理されたバッファコンテナは、基本的なZigデータ構造と手動アロケータ管理を示しています:
const std = @import("std");
const Allocator = std.mem.Allocator;

pub const BufferError = error{
    OutOfMemory,
    BufferOverflow,
    InvalidCapacity,
};

pub const DynamicBuffer = struct {
    allocator: Allocator,
    data: []u8,
    capacity: usize,
    length: usize,

    pub fn init(allocator: Allocator, initial_capacity: usize) BufferError!DynamicBuffer {
        if (initial_capacity == 0) return BufferError.InvalidCapacity;
        const memory = allocator.alloc(u8, initial_capacity) catch return BufferError.OutOfMemory;

        return DynamicBuffer{
            .allocator = allocator,
            .data = memory,
            .capacity = initial_capacity,
            .length = 0,
        };
    }

    pub fn deinit(self: *DynamicBuffer) void {
        self.allocator.free(self.data);
    }
};
高度な構造技術
Zigのビジュアライゼーションは、ハードウェアレジスタ、タグ付き状態ユニオン、組み込みマイコンドライバのマッピングに優れています。
1. 組み込み周辺GPIOコントローラ
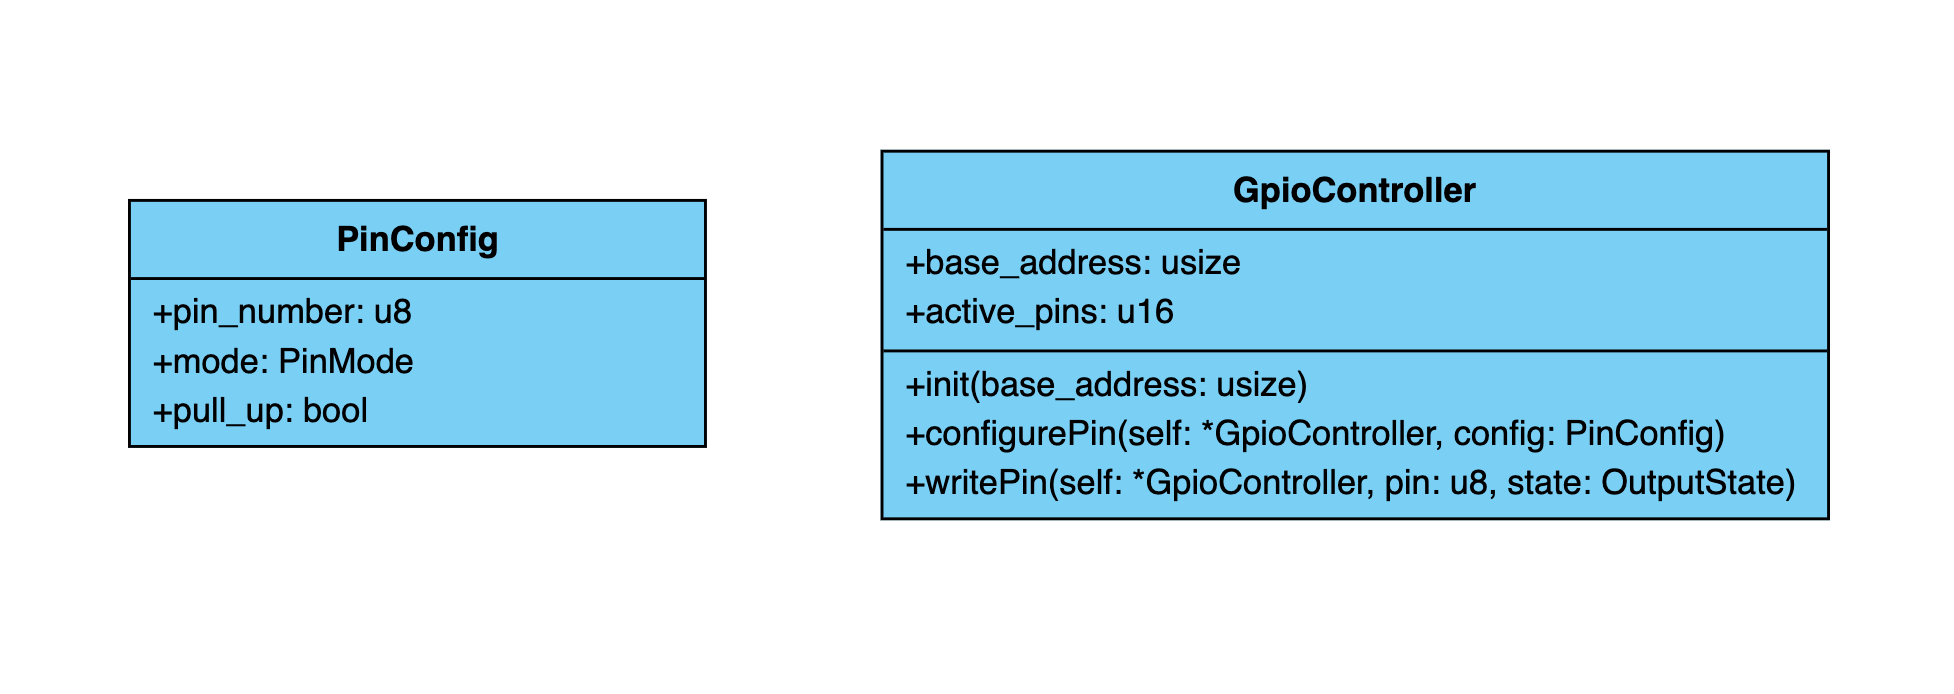
パックされたenum、タグ付きユニオン構成、デバイスハンドルstructを組み合わせることで、VPasCodeは低レベルのファームウェアアーキテクチャを読みやすい視覚的ツリーに明確に分解します:
pub const PinMode = enum {
    input,
    output,
    alternate_function,
};

pub const OutputState = enum {
    low,
    high,
};

pub const PinConfig = struct {
    pin_number: u8,
    mode: PinMode,
    pull_up: bool = false,
};

pub const GpioController = struct {
    base_address: usize,
    active_pins: u16,

    pub fn init(base_address: usize) GpioController {
        return GpioController{
            .base_address = base_address,
            .active_pins = 0,
        };
    }

    pub fn configurePin(self: *GpioController, config: PinConfig) void {
        _ = self;
        _ = config;
    }

    pub fn writePin(self: *GpioController, pin: u8, state: OutputState) void {
        _ = self;
        _ = pin;
        _ = state;
    }
};
イベントループとタグ付きタスクパイプラインの構造
非同期イベントループ、タグ付きユニオン(union(enum))、そして実行キューはバックエンドシステムエンジニアが安全なメモリレイアウトを管理するのを助けます。
1. カスタム非同期イベントループとタスクキュー
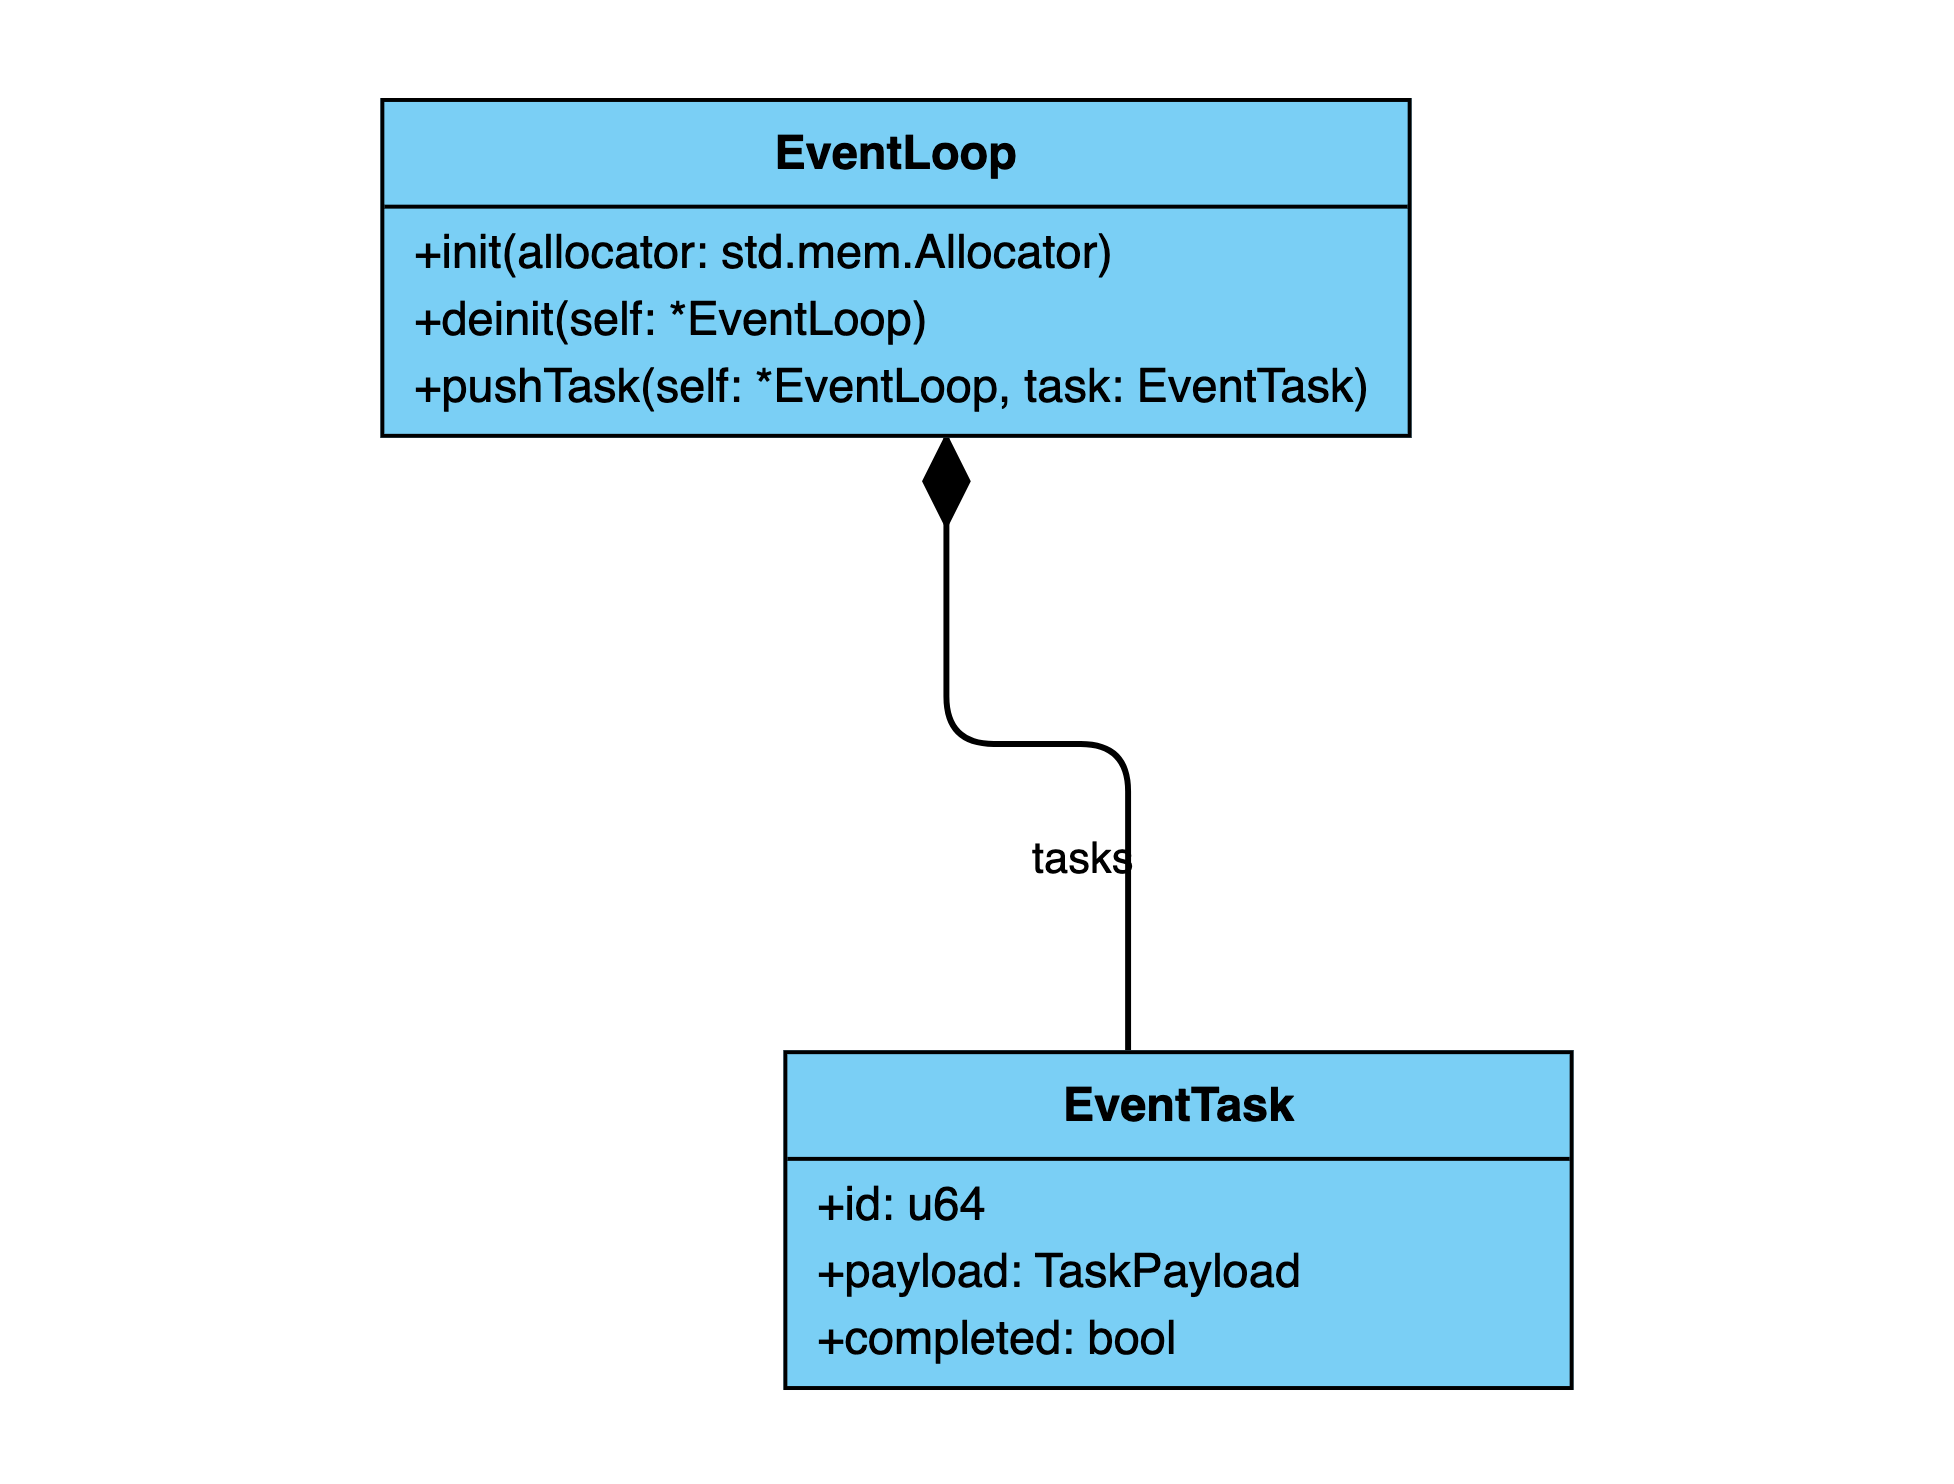
タスクペイロード、ジョブステートのユニオン、イベントループマネージャをグループ化して、タスク処理の境界を明確化する:
const std = @import("std");

pub const TaskType = enum {
    network_read,
    disk_write,
    timer_expired,
};

pub const TaskPayload = union(TaskType) {
    network_read: struct { socket_fd: i32, bytes_expected: usize },
    disk_write: struct { file_path: []const u8, data: []const u8 },
    timer_expired: struct { timer_id: u64 },
};

pub const EventTask = struct {
    id: u64,
    payload: TaskPayload,
    completed: bool,
};

pub const EventLoop = struct {
    tasks: std.ArrayList(EventTask),

    pub fn init(allocator: std.mem.Allocator) EventLoop {
        return EventLoop{
            .tasks = std.ArrayList(EventTask).init(allocator),
        };
    }

    pub fn deinit(self: *EventLoop) void {
        self.tasks.deinit();
    }

    pub fn pushTask(self: *EventLoop, task: EventTask) !void {
        try self.tasks.append(task);
    }
};
戦略的なベストプラクティス
- 明示的な構造体宣言を使用する: 構造体のフィールドを明確に型付けする(例:
allocator: Allocator)により、プロパティノードが明確な型ラベルでレンダリングされる。 - タグ付きユニオンを活用する(
union(enum)):型安全な視覚的表現のために、型なしの生メモリブロックではなく、タグ付きユニオンを使用してバリエーションペイロードをモデル化する。 - コンパイル時パラメータを明示的にマークする:高レベルの型パラメータが視覚的ノードカード上で読みやすく保たれるように、comptimeジェネリックまたはインターフェース契約に明確な名前を付ける。